
Step 1: decide what kind of model you need
Before opening any tool, decide whether size or looks matter more. It decides which editor to use.
- Needs exact dimensions, will be printed or manufactured: use CAD.
- Needs to look good, with colours and textures, for a scene, a game or a mockup: use mesh modeling.
- Not sure how to start: describe it to the AI and edit the result.
Step 2: create a CAD part
In VIZON, choose New CAD part from your library. Every CAD part starts with a sketch.
- Click Sketch and choose the Top plane.
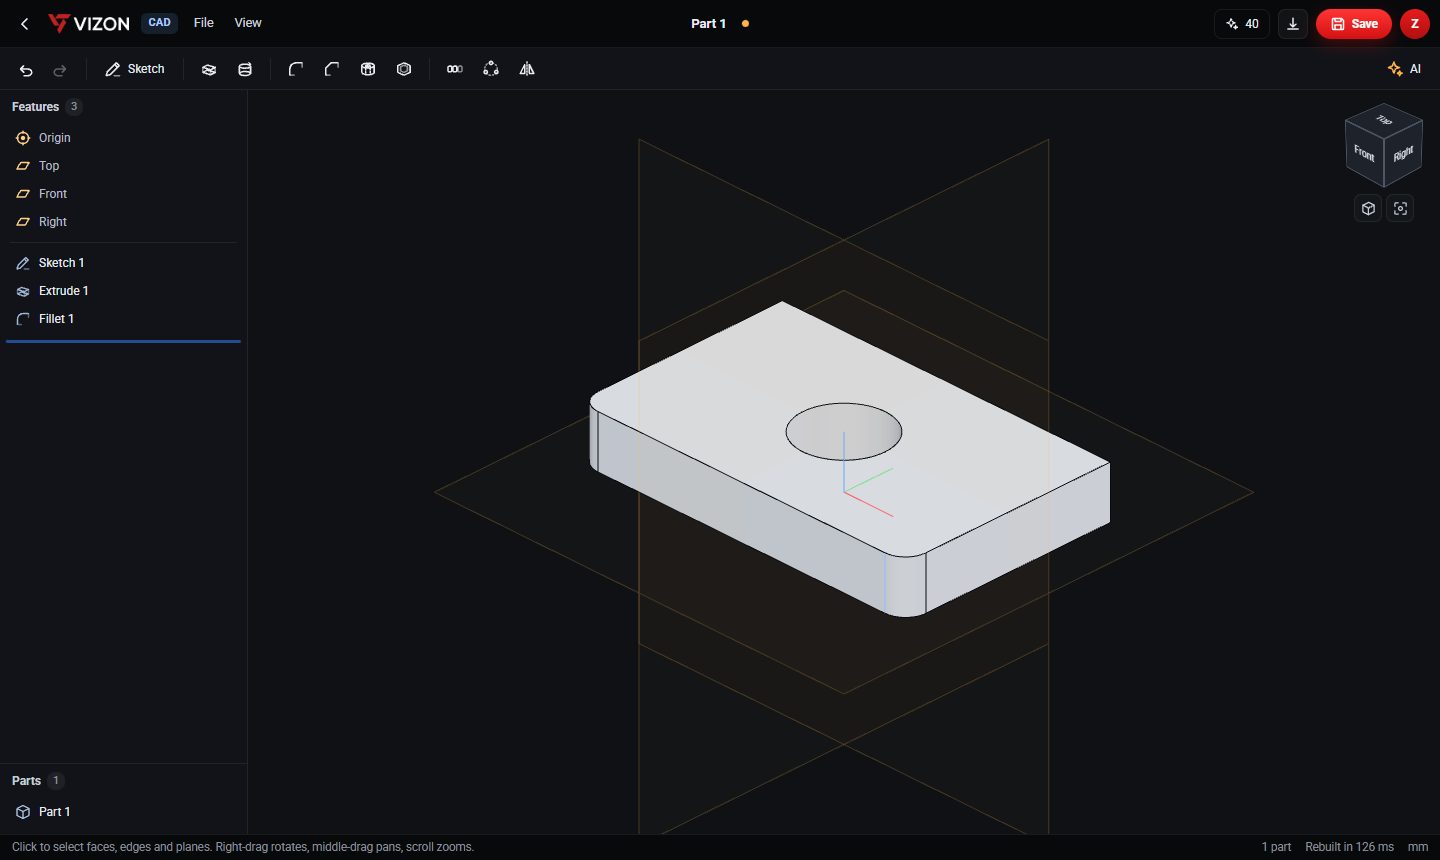
- Draw a rectangle and type its width and length, for example 80 by 50 mm.
- Finish the sketch and Extrude it 10 mm.
- Start a new sketch on the top face, draw a circle in the middle, and extrude it as a cut through the part.
- Add a Fillet and pick the four vertical corner edges.
Step 3: or build a mesh model
Open the 3D Model Creator instead. Add a cube from the Add menu, press S to scale it into a table top, then add cylinders for legs and press G to move them into place. Pick a wood material from the material panel and the model is ready.
Step 4: or ask the AI
In either editor, open the AI bar and describe the object with its sizes, for example "a plate 80 by 50 mm, 10 mm thick, with a 20 mm hole in the centre and 3 mm rounded corners". The AI builds it from editable features or shapes, so you can keep changing it by hand.
Step 5: save and export
Save to your library. CAD parts export as STEP for other CAD tools and STL for 3D printing. Mesh models download as GLB for the web and games.